
前提
Windows 10を使用。
virtualboxはインストールされている(6.1)
仮想OSの最小構成のisoイメージはダウンロードされている(CentOS7)
仮想マシンの追加
VirtualBoxマネージャーの[新規]をクリック

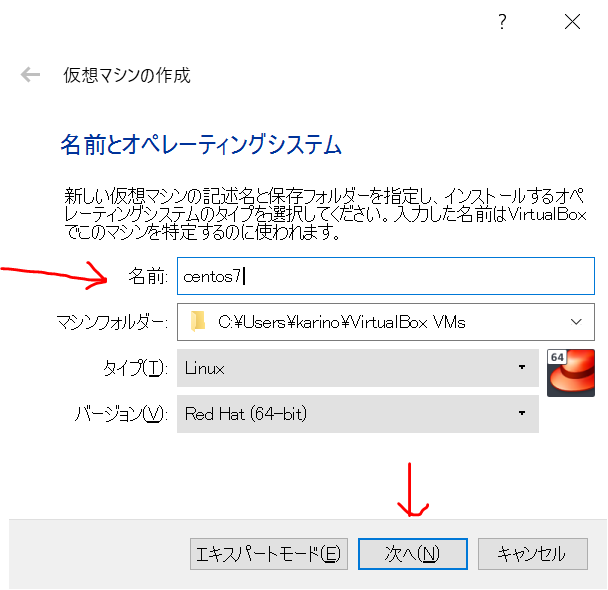
[名前]欄に適当な名前を設定。「centos」などといった名前を付ければ、[タイプ]や[バージョン]が自動で切り替わる。[マシンフォルダー]もそのままで[次へ]ボタンをクリック
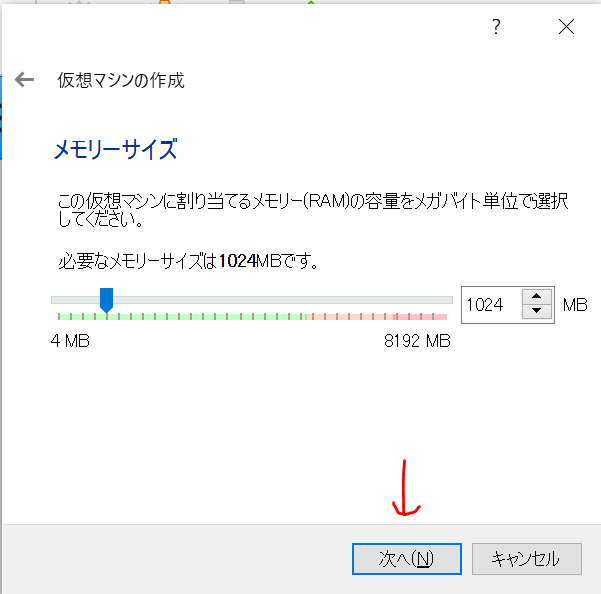
メモリを変更しなくてよければそのまま[次へ]ボタンをクリック
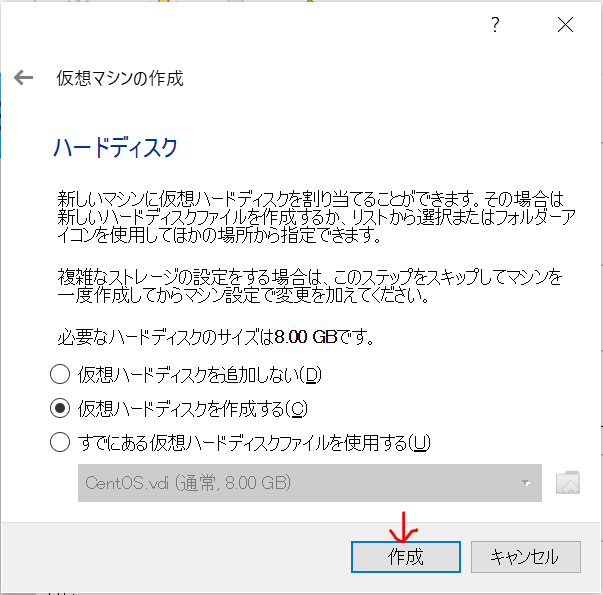
「仮想ハードディスクを作成する」を選択し(選択されていることを確認し)、[作成]ボタンをクリック
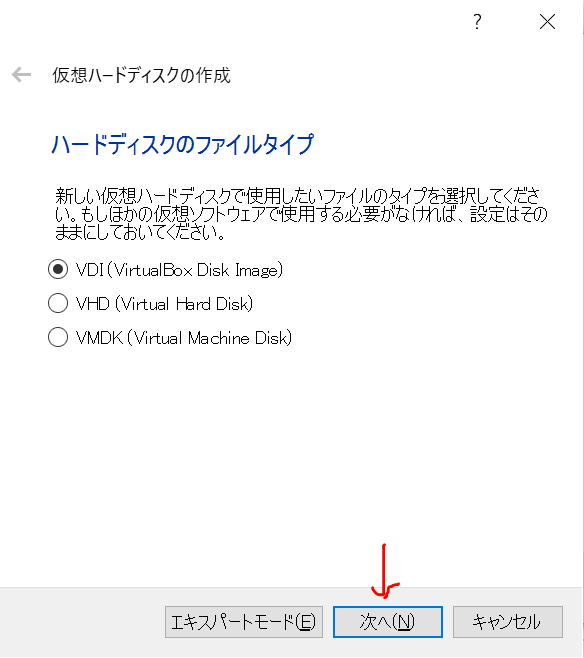
VDIが選択されていることを確認し、[次へ]ボタンをクリック
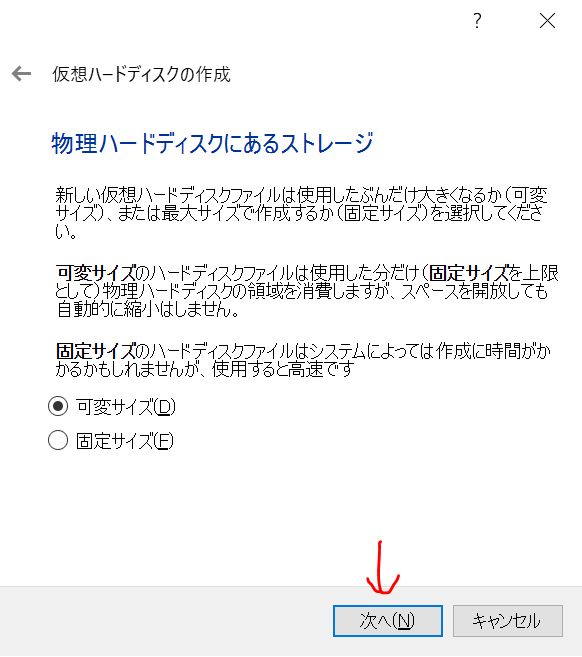
(お好みで)可変サイズが選択されていることを確認し、[次へ]ボタンをクリック
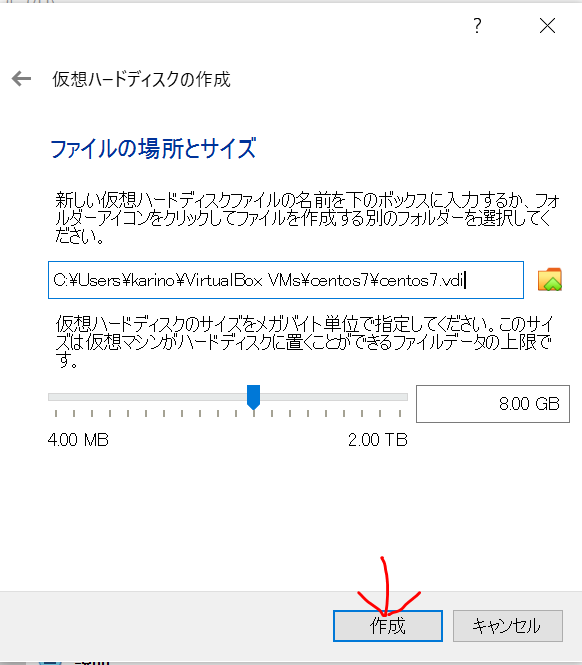
場所とサイズを変更しなくてよければそのまま[作成]ボタンをクリック
VirtualBoxで仮想マシンの設定
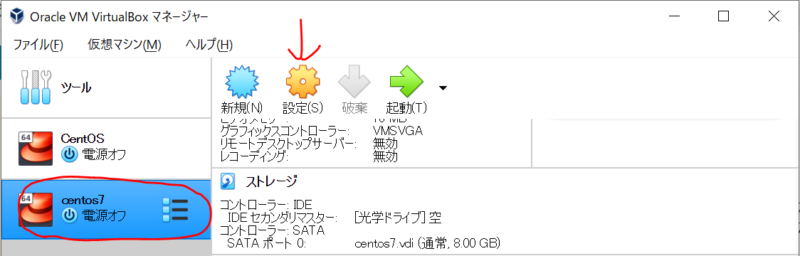
対象の仮想マシンを選択し、[設定]をクリック
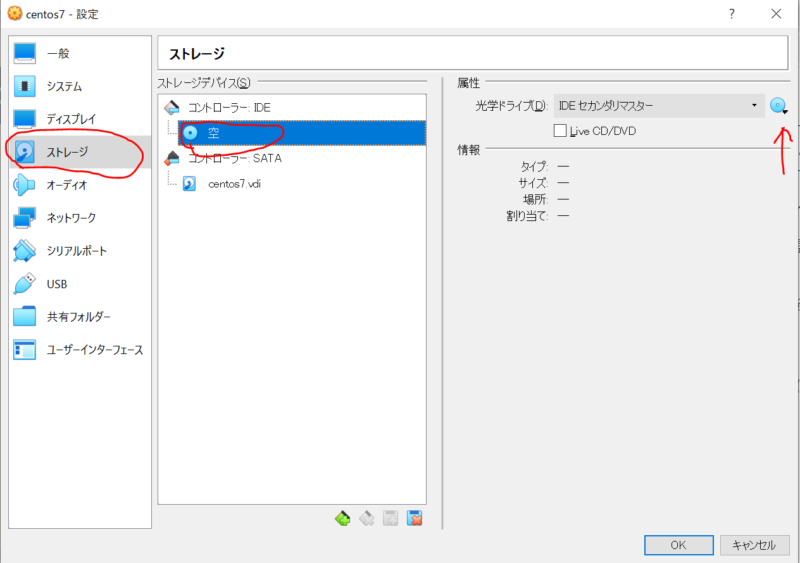
「ストレージ」を選択し、「空」となっている部分を選択。その後属性に表示されるディスクマークをクリック。表示されるメニューから「仮想光学ディスクの選択/作成」をクリック。目的のisoファイルを選択して[選択]ボタンをクリック
「ネットワーク」を選択し、「アダプター2」を選択。「ネットワークアダプターを有効化」にチェックを入れ、割り当てから「ホストオンリーアダプター」を選択。※VirtualBoxでホストオンリーアダプターが作成されていない場合は、先にそちらを作成しておく
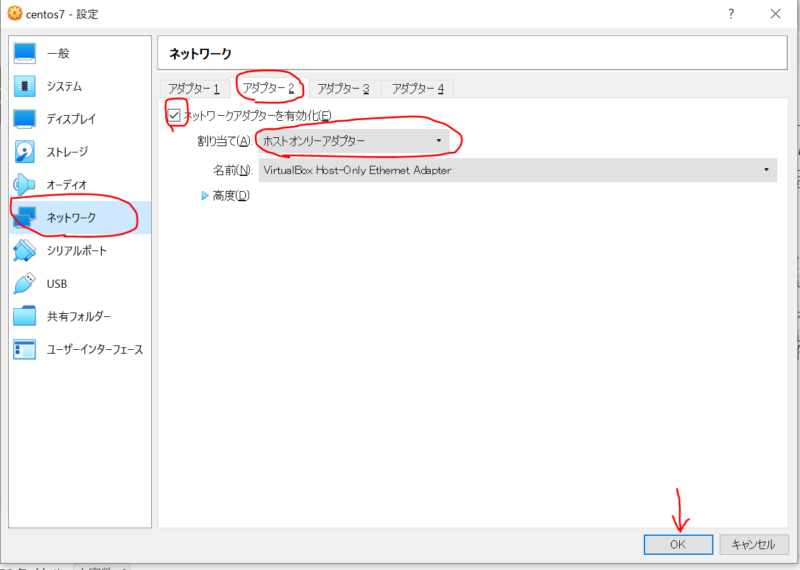
[OK]ボタンをクリック
仮想マシンを起動して初期設定
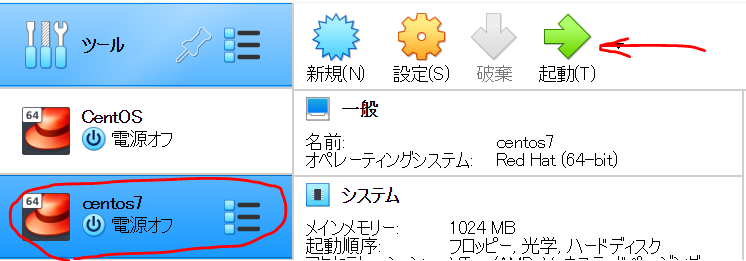
対象の仮想マシンを選択し、[起動]をクリック
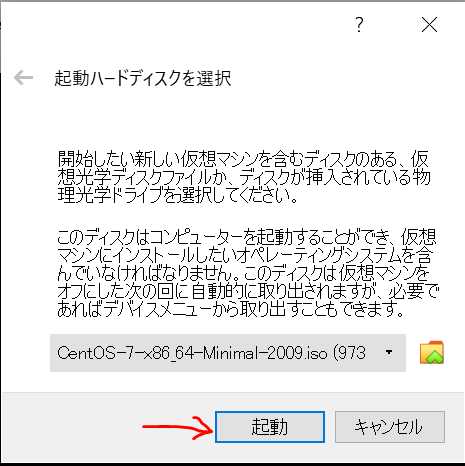
「起動ハードディスクを選択」が表示された場合は、isoイメージを選択して[起動]ボタンをクリック
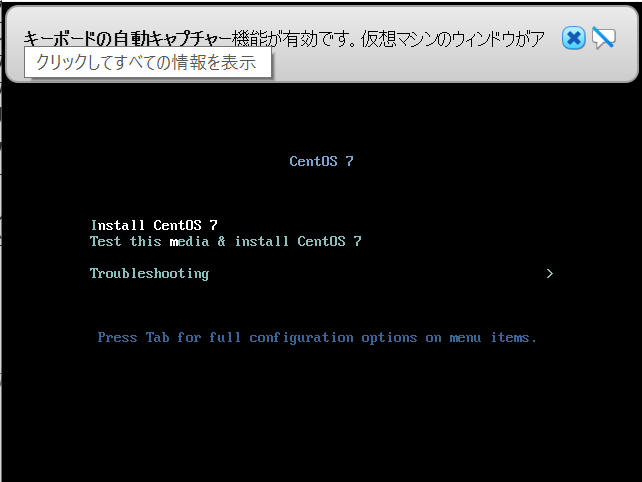
矢印キーを使って「Install CentOS 7」を選択してEnter
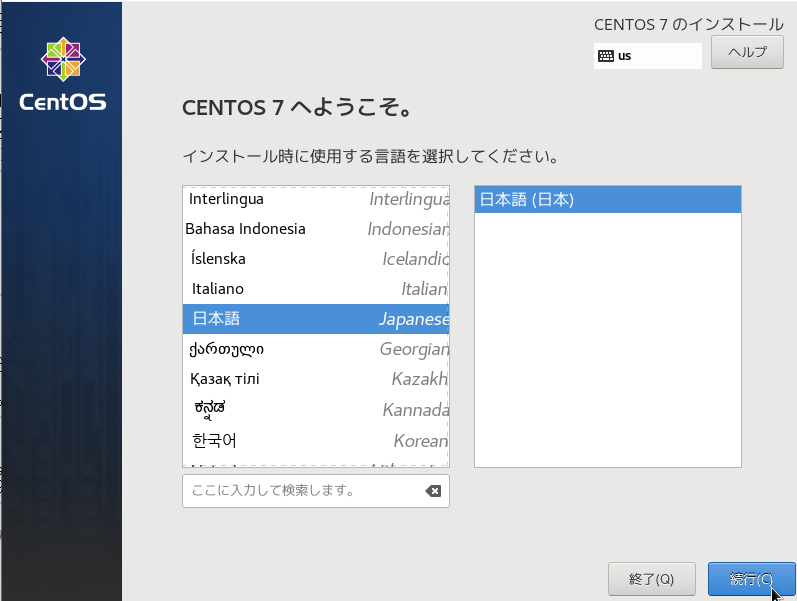
インストールで使用する言語を選択(例では日本語を選択)し、[続行]ボタンをクリック
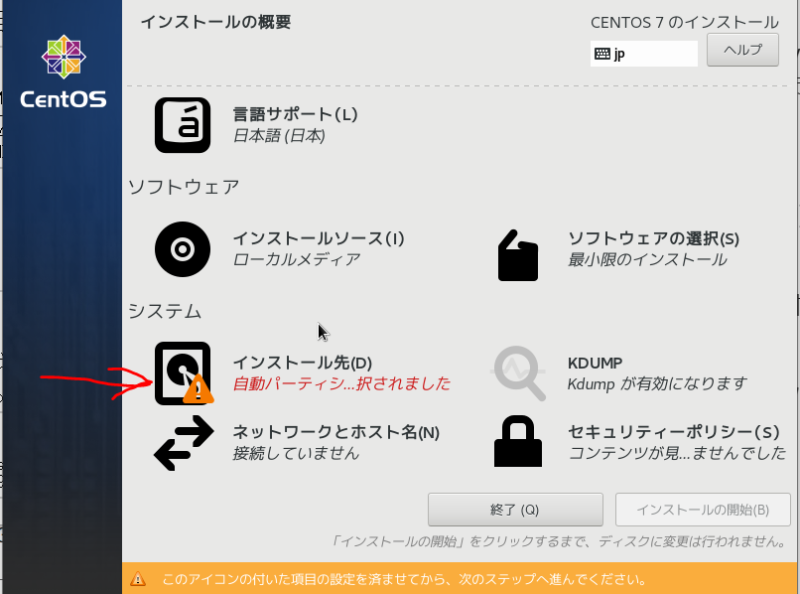
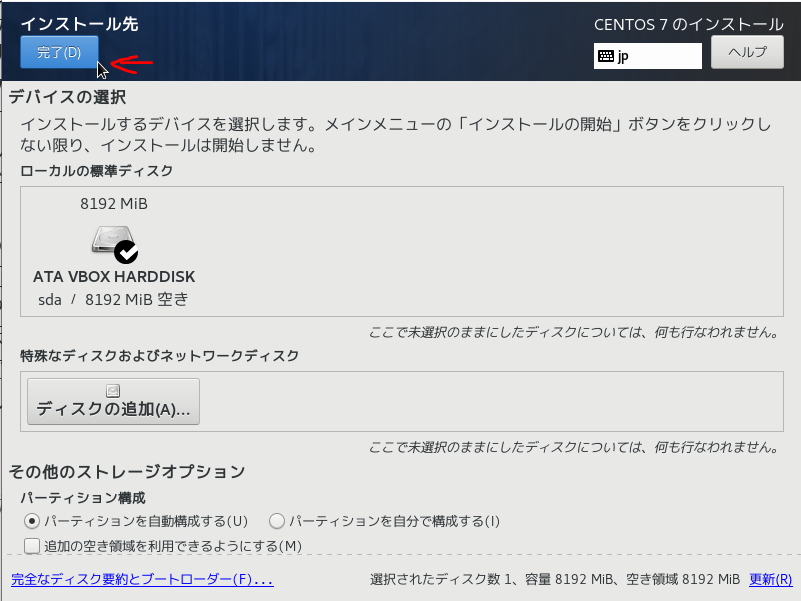
「インストール先」をクリック
特にいじらず[完了]ボタンをクリック
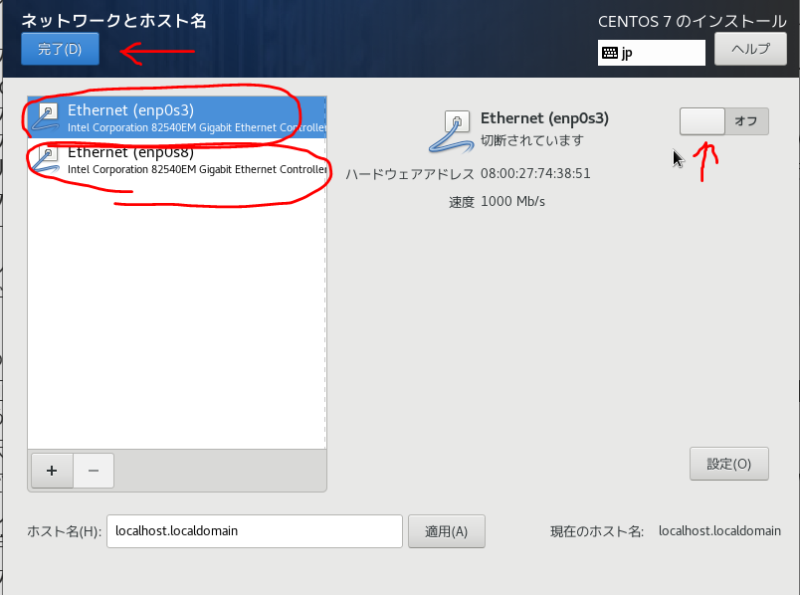
「ネットワークとホスト名」をクリック
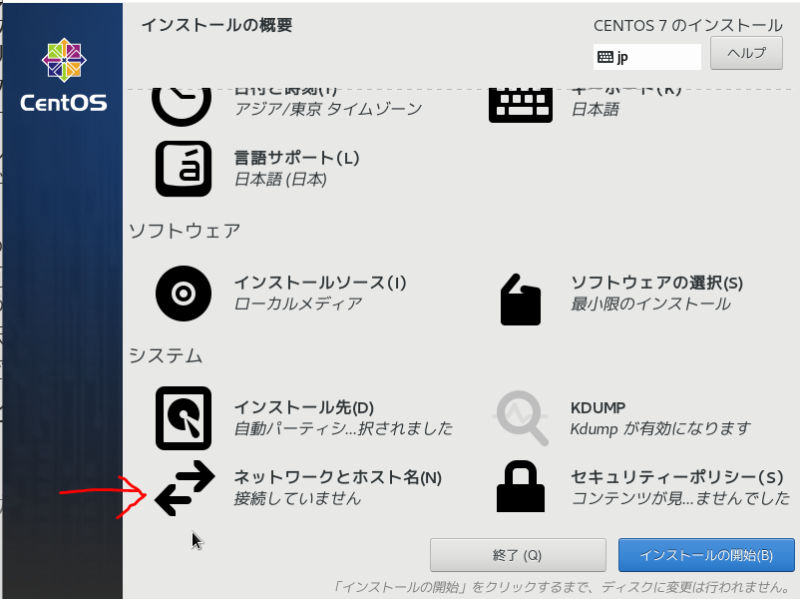
ネットワークが2つ存在するはずなので、それぞれ「オン」にして[完了]ボタンをクリック
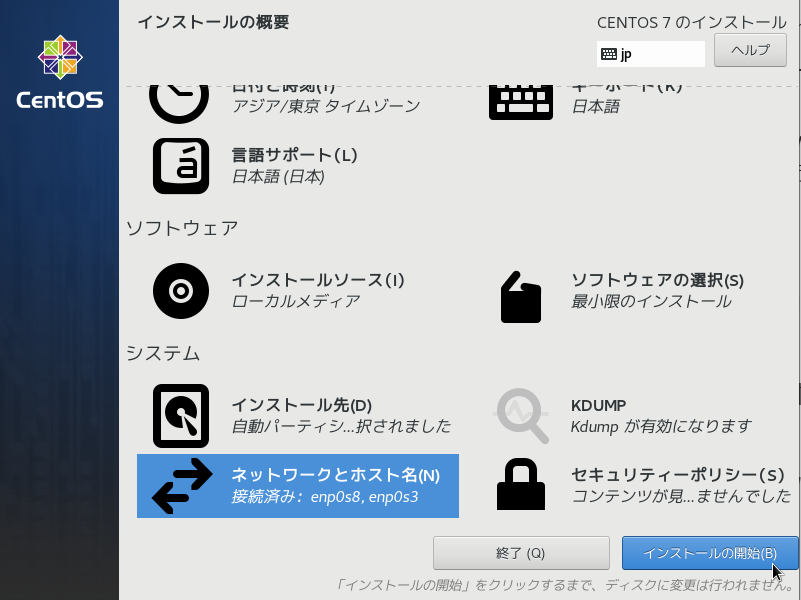
[インストールの開始]をクリック
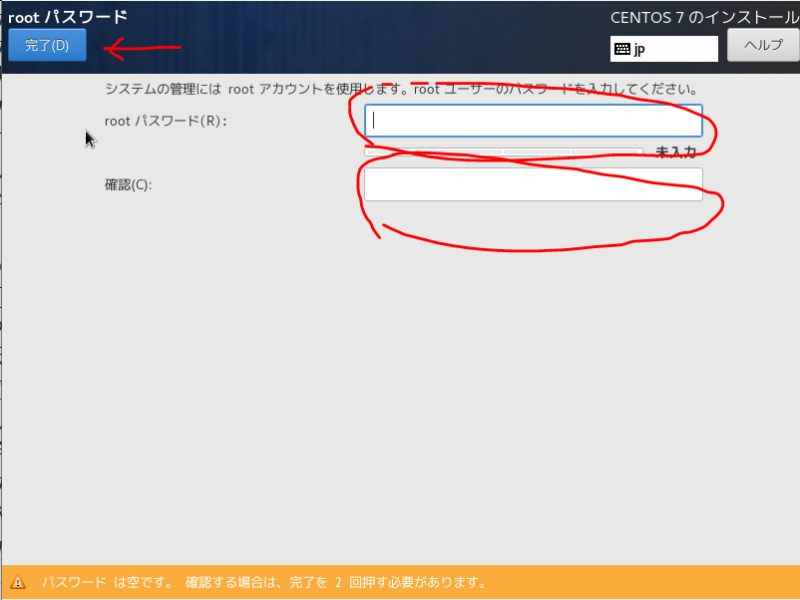
「ROOTパスワード」をクリック

設定するパスワードを入力し、[完了]ボタンをクリック
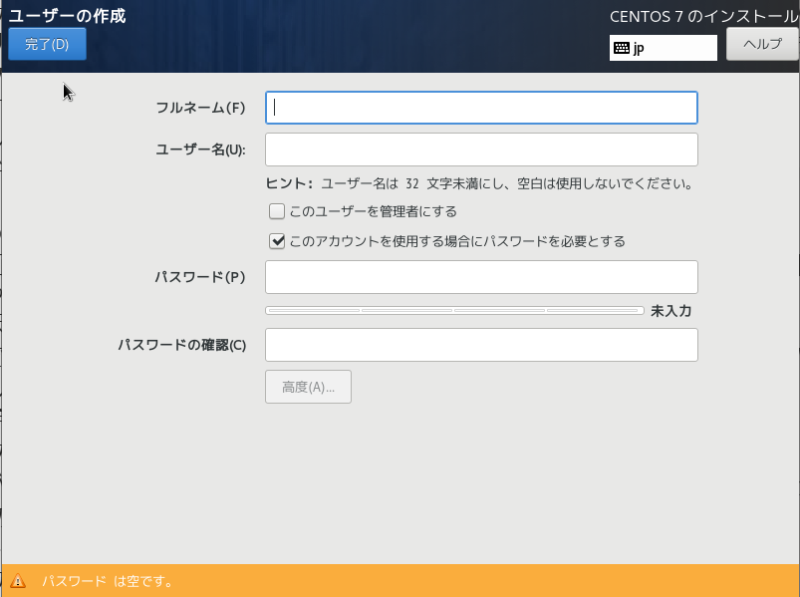
同様に「ユーザーの作成」をクリック
必要項目を入力し[完了]ボタンをクリック
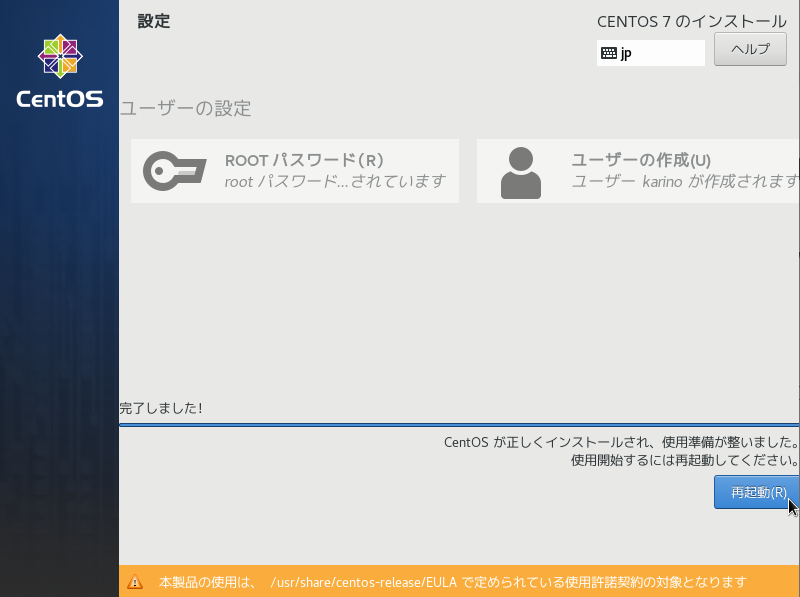
[設定完了]をクリック(設定完了が表示されなければこの手順は飛ばす)
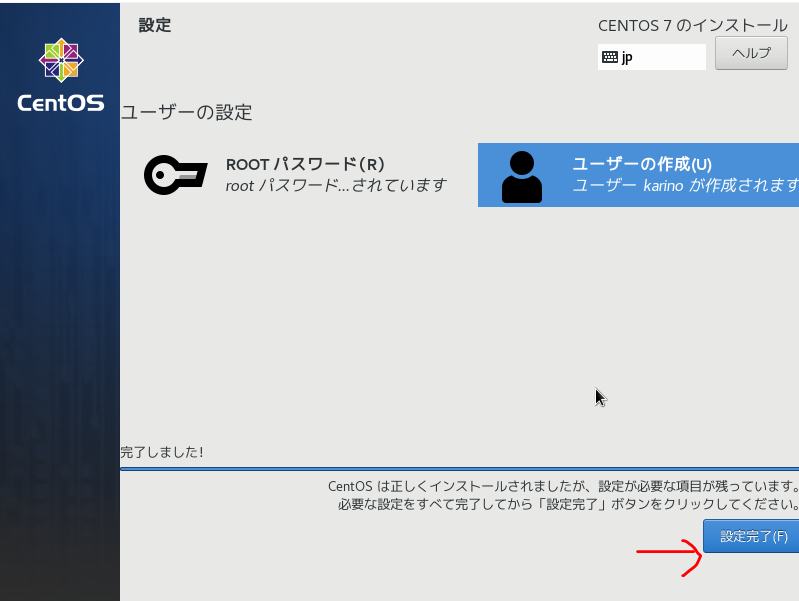
[再起動]をクリック
以下、再起動してログインした仮想マシンのコマンドラインで実行。
英語化
# localectl set-locale LANG=en_US.utf8ネットワークの有効化
VirtualBox上のゲストOS(CentOS)から外部ネットワークにつなぐ設定メモ(Windows10編)を参考に
# sed -i -e s/ONBOOT=no/ONBOOT=yes/ /etc/sysconfig/network-scripts/ifcfg-enp0s8
# systemctl restart network
ここまでで最低限の設定はできるかと。
Railsのインストールなどは次の記事で。

コメント